 Before I tell you how I 'made' my fascinator, please keep in mind that I am artistically challenged. I can barely draw stick figures, I usually get glue on my hands, and I've been known to accidentally sew seams shut. So trust me when I say that you, undoubtedly, will make a fascinator 100 times better than me! It's just a fact.
Since I'm artistically challenged, I cheated a bit on my DIY fascinator. I went to my local Claire's to see if I could find a hair clip I could work with (i.e. glue tulle and feathers to it). Luckily, I was able to find a black flower clip.
 Next step was to turn the flower clip into a fasincator! Here are the materials I used : black tulle, feathers , my trusty glue gun.
 Here's a close up of the feathers I used.
Unfortunately, I didn't take pictures of my DIY process as this was before I had a blog so you will have to use your imagination! (The photos posted here I took last night)
Lucky for artistically challenged me there are a lot of online resources for DIY fascinators. Here are the ones I gleaned from: Simplicity Classroom, Corvus Tristis, and Wedlog. Basically, here is what I did:
Step 1: Arranged tulle (or netting) and the feathers around the hair clip until I was happy with the look. (Looking back, I would have taken a picture of my arrangement at this point so I could achieve the exact same look when it came time to gluing).
* How much tulle/netting and how many feathers is totally up to you. I just eye-balled it.
Step 2: Took the tulle and gathered it in the middle. Played around with the gathers until I was happy.


Step 4: The gluing part. Holding the tulle with the sewn 'point' away from me (see below), I glued the the sewn 'point' to the back of the flower clip.
Step 5: Put enough glue on the back of the clip for the flowers, and quickly, before the glue dried, arranged the feathers and secured the ends of the feathers into the glue (this is where the 'pre-photo' would have come in handy).
Step 6: Allow 10-15 mins to dry.
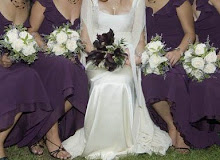
And voilà.........my fascinator! Here's picture of me wearing it for the first time to a wedding. (Ignore the cheesy grin)

Let me know if you have any questions!
For those of you in Toronto, I purchased my tulle from Fabricland and the feathers from Sussman's Bridal Supplies, 420 Queen Street West (just west of Spadina).


4 comments:
looks great! I have yet to try my own. I like to get people to do it for me :)
You insist you're not crafty ... but I think you did a great job. Really!
Lookin' good! I want to make one now!
Thanks everyone!
Post a Comment